Use Tropical Stencils to Transform your Bedroom!
A Tropical-Themed Artful Stencil Project by Joni Prittie
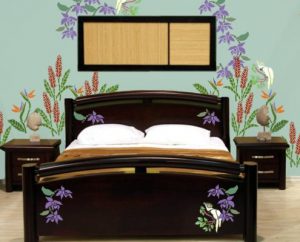
If you have ever longed for a quiet time on a remote tropical island, this may be the project for you. Our tropical garden mural project with Wild Ginger, Bird of Paradise, fragrant Orchids and beautiful lemon white Cockatoos sets the mood for your very own island sanctuary. This mural has endless variations.
You can use just the lush Leaves in our tropical collection to create a true jungle feeling. We even have a sweet little Monkey! You can use our stencils to create a border around the top of walls, trailing the leaves here and there.
Of course, furniture is also a great surface for stenciling. When stenciling on furniture, be sure to use an appropriate paint for the surface to be stenciled. Water based paints are good on pieces painted with a base coat of acrylic or water based paints. Use oil based paints on furniture that has been treated with an oil based paint.
Stenciling a Mural: Basics
Because each mural is an individual art project, determined by your room size, furniture, windows and lighting, here are the basics of creating a mural using stencils from The Artful Stencil collection of Tropical Stencils.
Mural Materials:
Stencils of your choice: Our tropical stencils are featured in this project – Cockatoo, Orchid 1, Ginger and Bird of Paradise were used. It is amazing how large a mural one can design with only four stencils!
Acrylic paint: enough paint to stencil your colors consistently. If you are mixing colors, be sure to have enough to stencil all the flowers in that color range. Mixing colors in a small jar is a great idea.
Wall paint: It is an excellent idea to have a small amount of your wall paint on hand for touch up around stencil shapes, in case any stencil has been placed in a way that is not flush against the wall, allowing some paint to escape the edges.
Additional items: stencil brushes (medium and large), blue painter’s tape, paper towels, a small bowl of water for brush cleaning, a pencil if you need to mark stencil placement, and a medium-sized watercolor brush for touch-up.
Let’s Get Started!
Step 1
Measure the wall to be decorated and take into consideration how your mural design will work with your furniture placement.
Step 2
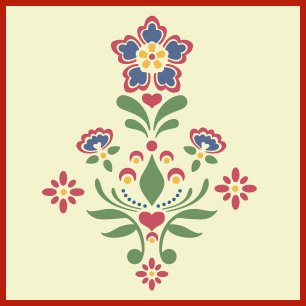
Choose your mural “theme”. This can be as simple as a single stencil repeated in the same or coordinating colors on the wall or an all over garden mural such as our tropical garden.
Select the stencils you feel really work together. Remember that a stencil such as our bird of paradise flowers can be turned over and stenciled with the flowers facing in the reverse direction. This allows for an area to be “framed” by the design.
Measure the size of your stencil/s and be sure the scale of the stenciled image will work for your wall space.
Note: We used our orchid stencil as a repeat around the framed wall hanging and stenciled extra single orchids to fill in the design.
Step 3
Begin by using blue painter’s tape to secure stencil to the wall. Tape around stencil edges and in the case of a large stencil, pieces of tape can be placed across some of the stencil holes and removed as you stencil. This will secure the stencil tightly to the wall. You will be using your paint on a vertical surface, so use very little paint on the stencil brush to avoid drips.
We began on the left side of the bed and taped a ginger and bird of paradise stencil in place. After stenciling these two flowers, we flipped the ginger stencil over (after cleaning with warm water and drying the stencil), placed the reversed stencil on the wall above our first ginger and gave height to the garden.
Proceed in this manner, stenciling a flower, moving the stencil to your next position and stenciling the design again.
Note: It is good to remember that the feeling of a garden mural is fresh and plants grow to different heights. The placement of floral stencils for such a mural can be much looser than say, a Colonial border in a very traditional room.
Step 4
When mural is complete, use small amount of wall paint to clean up any drips or uneven edges around stenciled shapes.
Walls are often daunting when beginning a mural. Begin in a corner or along the floor board and build the mural upward. It just seems to be a good place to start.
Remember…
It’s only paint. Any section you are not happy with can be simply painted out with your wall paint.
Happy Stenciling!