Stenciling Basics – Stenciling Best Practices

Supplies

Stenciling Mediums

Stenciling works well on wood, paper, primed canvas, natural fabric, walls and wood floors. Home decorating projects include stenciled lamp shades, floor cloths, table runners, painted furniture, kitchen cupboards, and curtains to name a few. We have added pictures to offer an idea of ways to use our stencils.

Basic Stencil Supplies

You will need the same basic supplies for all stencil projects. Be sure the paint used for your stencils is compatible with the surface to be stenciled. There are many good stencil paints available at craft and hobby shops.

Download Stenciling Basic PDF

Quick drying paints: – Cream stencil paint is easy to use – Acrylic paint has almost unlimited color choices – Latex wall paint works well for stenciling as well

Steps to First-Class Stenciling

It’s All In The Preparation

Begin with a clean surface. If you are stenciling on fabric, it is best to prewash and iron flat. Pre-washing the fabric removes any fabric coating. Always follow the paint manufacturer’s instructions.

For a project such as floor cloths or items that will take a lot of direct wear, it is best to protect stencil paint with several light, even coats of acrylic varnish.

We use acrylic paint for most of our stencil projects. This is the paint you will find mentioned in our instructions.

Design Considerations

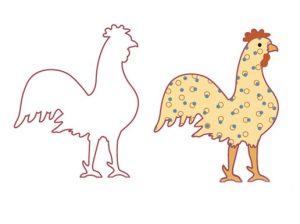
Our single overlay stencils are created with ‘bridges’ of negative space between the painted shapes. These bridges give your finished project a traditional old world stencil look. If you want your project to have a more hand painted look, simply use a small brush and paint in the bridges. A few of our stencils are double over stencils and these have guilds holes for exact placement. Simply mark with a pencil and match the marks when placing your second stencil.

The most important key to successful stenciling is to use a very small amount of paint when loading the brush. Excess paint will seep under your stencil.  For happy stenciling, less is more.


Supplies

  • Stencil
  • Stencil brush for each color
  • Stencil paint
  • Painters masking tape
  • Pencil & eraser
  • Yardstick / measuring tape
  • Paper towels – moist & dry
  • Paper plates for palettes
  • Bowl of water
  • Aluminum foil pieces to wrap brushes while repositioning stencil
  • Paper for testing color

Optional:

  • Stencil spray adhesive
  • Permanent fine & medium tip markers
  • Permanent paint pens
  • Small watercolor brush

Stencil Techniques

Step 1: Securing the Stencil

Position stencil on project surface. Stencil can be secured in place with painter’s masking tape around all sides of stencil or spray stencil adhesive.

If project is on textile surface such as a pillow cover, place stiff cardboard covered with plastic inside the cover and beneath surface to be painted.

Step 2: Painting with Stencil Brush

Using stencil brush, dab bristles in small amount of paint on a paper plate pallette and swirl until lower portion of bristles are evenly covered with paint.

Wipe away any excess paint from brush with dry paper towel.

Using circular motion work brush on a clean paper plate to remove excess paint. The goal is to have your brush feel almost dry when applying paint to stencil. You may choose to mix your own colors. In this case, mix colors in a small jar. This will assure that you have enough color to finish the project.

Step 3: The Pounce Application Method

Gently “pounce” stencil brush in a straight up and down motion working from the outer edges of stencil cut out shape working towards the center.

If your paint is black or a dark color it is best to layer light layers of paint upon itself for an even effect. The results will be more opaque.

You may choose to mix your own colors. In this case, mix colors in a small jar. This will assure that you have enough color to finish the project.

A safe way to use multiple colors is to use masking tape to cover the shapes not being painted. Always allow one color to dry completely before proceeding to the next color.

If you are using a single overlay stencil with multiple colors, leave stencil in place and allow one color to dry completely before adding another color. It is nearly impossible to reposition a stencil perfectly once it has been removed from project’s surface.

If you are working on a large project, wash and thoroughly dry stencils often. This will keep your stencil edges free of any small bits of paint.

Small plastic bags work well to keep paint loaded brushes moist while repositioning a stencil.

Step 4: Final Touch Ups

When paint is dry, remove tape and stencil. Use a small watercolor brush with paint to erase any paint drips or errors. Clean stencil with warm water and soft sponge. Store stencil flat.

An interesting effect can be produced by pouncing paint around the edge of stencil only, leaving center open.

Use stencil to draw outline for hand painting.


Welcome! Thank you for visiting The Artful Stencil

Subscribe today and recieve a 15% off coupon on today's order. Be the first to know about new arrivals and promotions.